Table of Contents
Who Was William Wallace? The Legendary Scottish Warrior of the 13th Century
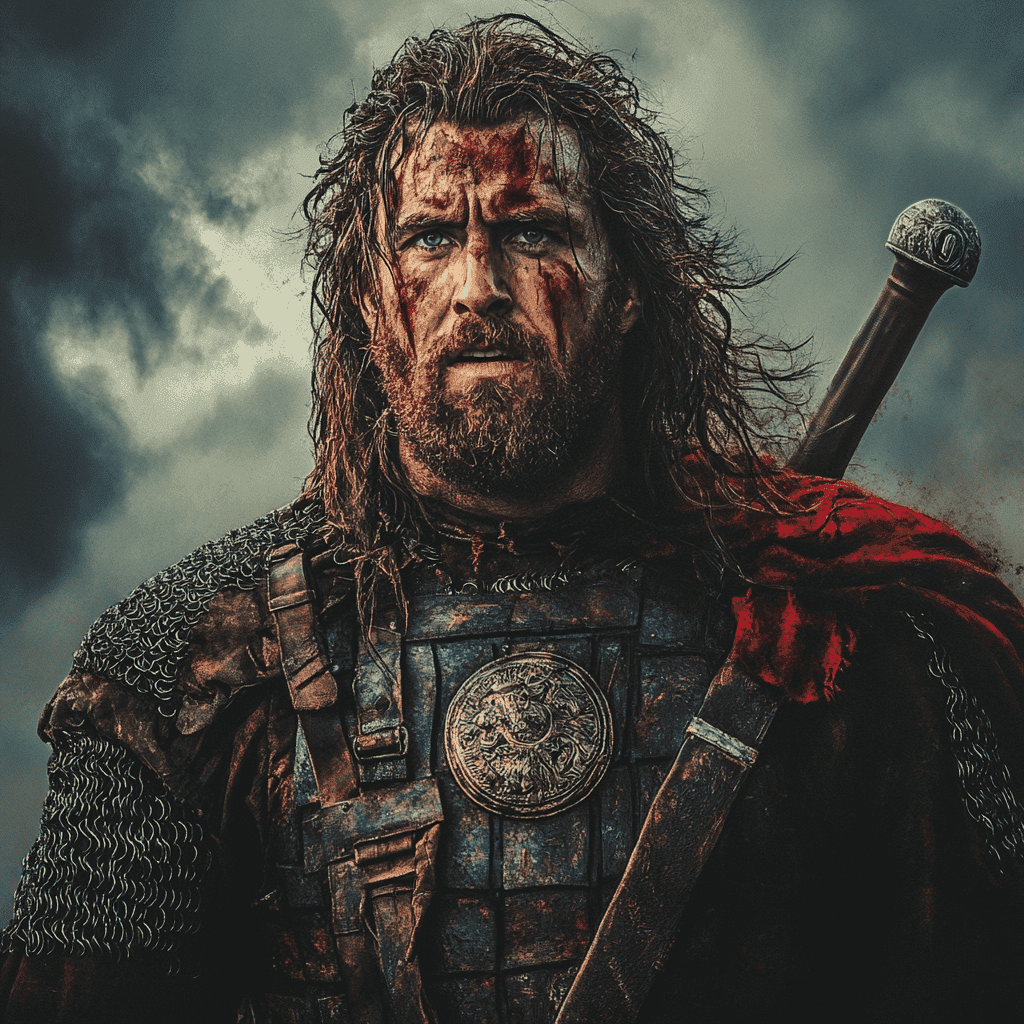
Introduction: The Man Behind the Legend
William Wallace stands as one of Scotland’s most iconic figures—a man whose name became synonymous with resistance, whose tactical brilliance achieved the impossible, and whose brutal execution transformed him into a martyr whose memory would inspire a nation for centuries. Yet separating the historical William Wallace from the legendary figure who emerged after his death presents significant challenges, as myth and reality have become intertwined over seven centuries.
What we know with certainty is this: In the late 1290s, when Scotland faced English occupation and many Scottish nobles had submitted to King Edward I’s authority, a man named William Wallace emerged to lead a resistance movement that achieved stunning military victories against overwhelming odds. His greatest triumph at Stirling Bridge in 1297 demonstrated that English power was not invincible, proving that tactical intelligence could overcome superior numbers and equipment.
Wallace’s story is one of meteoric rise and tragic fall. From relative obscurity in 1297, he rose within months to become Guardian of Scotland, effectively the nation’s military leader. Yet just a year later, he suffered catastrophic defeat at Falkirk, was forced into hiding, was eventually betrayed, and was executed with savage brutality designed to terrorize the Scots into permanent submission. The execution failed utterly in its purpose—instead of crushing Scottish resistance, Wallace’s death galvanized it, inspiring Robert the Bruce and others to continue the fight for independence.
The challenge in writing about William Wallace is that much of what we “know” comes from sources written decades after his death, often with propagandistic purposes. The primary source for many details of his life is “The Acts and Deeds of Sir William Wallace,” a long epic poem by Blind Harry written around 1477—nearly 200 years after Wallace’s death. While based on some genuine traditions, Blind Harry’s work is more legendary romance than historical document, similar to King Arthur stories or Robin Hood tales.
Modern historians must therefore carefully distinguish between:
- Documented historical facts (his victory at Stirling Bridge, his defeat at Falkirk, his execution in 1305)
- Probable historical facts (his origins as a minor nobleman, his role as Guardian of Scotland)
- Possible but unverifiable traditions (specific exploits and adventures recorded in later sources)
- Obvious legend (supernatural elements and romantic embellishments)
This article aims to present what we actually know about the historical William Wallace, acknowledge where uncertainty exists, explore his genuine military and political significance, and examine how his legend developed and why it remains powerful today. Wallace’s true story, even stripped of later embellishments, reveals a remarkable military leader whose impact on Scottish history was profound and lasting.
Beyond Scotland, Wallace’s legacy speaks to universal themes—the power of resistance against overwhelming force, the role of tactical innovation in warfare, the making of martyrs and national symbols, and how individuals can inspire movements that outlive them. His story remains relevant not because of Hollywood dramatizations, but because it addresses fundamental questions about freedom, loyalty, resistance, and sacrifice that resonate across cultures and centuries.
Understanding the Historical Context: Scotland Under English Domination
The Crisis of 1286-1296: Scotland Loses Its Independence
The crisis that would eventually produce William Wallace began with a tragic accident on a stormy night in March 1286. King Alexander III of Scotland, riding along coastal cliffs in darkness to visit his young wife, fell from his horse and died from the fall. This seemingly random event would trigger a chain of disasters that nearly destroyed Scottish independence.
Alexander III’s death created an immediate succession crisis:
All of Alexander’s children had predeceased him, leaving no direct adult heir.
The heir to Scotland’s throne was Margaret, Maid of Norway—Alexander’s three-year-old granddaughter living in Norway.
The Scottish nobility agreed Margaret should be queen, but arrangements had to be made to bring her to Scotland and provide for her care until she reached maturity.
A treaty was negotiated with England to marry young Margaret to Edward I’s son (the future Edward II), potentially uniting the Scottish and English crowns peacefully.
However, in September 1290, Margaret died during the sea voyage to Scotland—possibly from seasickness or illness. She was only seven years old, and her death plunged Scotland into crisis.
With no clear heir, thirteen different claimants came forward, the strongest being John Balliol and Robert Bruce (grandfather of the future King Robert the Bruce). Rather than allowing civil war, the Scottish nobles made a fateful decision: they asked King Edward I of England to arbitrate between the competing claims.
Edward I: “Hammer of the Scots”
King Edward I of England was one of medieval Europe’s most capable and ruthless monarchs. Known as “Longshanks” for his unusual height (over 6 feet tall, extraordinarily tall for the medieval period), he had already conquered Wales and was known for his military prowess, administrative ability, and absolute determination to expand English power.
Edward agreed to arbitrate Scotland’s succession, but with conditions that revealed his true intentions:
All claimants had to acknowledge Edward as Scotland’s overlord, establishing English feudal superiority.
Scottish castles were temporarily handed over to English control during the arbitration process.
Edward would have final authority in all matters regarding Scotland’s kingship.
In 1292, Edward selected John Balliol as King of Scotland—largely because Balliol had the strongest legal claim, but also possibly because Edward believed Balliol would be a weak, compliant puppet.
For a few years, this arrangement functioned, but Edward’s treatment of Scotland became increasingly imperious:
He demanded Scottish military service for England’s wars against France, treating Scotland as a subordinate kingdom rather than an independent ally.
He heard legal appeals from Scotland in English courts, undermining Scottish judicial independence.
He imposed taxes and made administrative demands that violated Scottish sovereignty.
By 1295, the Scottish nobility had had enough. They negotiated the “Auld Alliance” with France—a mutual defense treaty against England—and when Scotland refused Edward’s demands for military service, war became inevitable.
The English Invasion and Occupation (1296)
Edward I’s response to Scottish defiance was swift and devastating.
In March 1296, he invaded Scotland with a large, well-equipped army, determined to crush Scottish resistance and establish permanent English control.
The campaign was brutally effective:
The Sack of Berwick (March 30, 1296): English forces captured the prosperous town of Berwick and massacred perhaps 7,000-15,000 civilians (sources vary widely on numbers, but all agree it was extensive slaughter). This atrocity was designed to terrorize Scotland into submission.
The Battle of Dunbar (April 27, 1296): A Scottish army attempting to resist was decisively defeated, with many Scottish nobles captured. This battle effectively destroyed organized Scottish military resistance in a single afternoon.
King John Balliol was forced to abdicate in a humiliating ceremony where he was stripped of his royal insignia, earning him the mocking nickname “Toom Tabard” (Empty Coat).
Edward seized important Scottish symbols, including the Stone of Destiny (on which Scottish kings were crowned) and government records, taking them to England.
English officials took control of Scotland, treating it as a conquered province rather than an independent kingdom.
Scottish nobles were required to swear fealty to Edward I, signing documents (the “Ragman Rolls”) acknowledging English sovereignty.
By summer 1296, Scotland appeared completely conquered. Edward reportedly remarked, “A man does good business when he rids himself of a turd”—displaying his contempt for Scottish independence. He returned to England, believing the Scottish problem permanently solved.
But Scotland was not as defeated as it appeared. While most nobles had submitted (having lands and families that could be threatened), resentment simmered among lower-ranking nobility, common people, and those with less to lose. Into this volatile situation would emerge William Wallace.
The Rise of William Wallace: From Obscurity to Guardian
Origins: What We Actually Know
The historical record regarding William Wallace’s origins is frustratingly sparse. Unlike nobles whose births, marriages, and landholdings were documented, Wallace came from a social rank where fewer records were kept and have survived.
What we can reasonably conclude:
He was born around 1270, give or take a few years, making him in his mid-to-late twenties when he emerged as a resistance leader in 1297.
His father was likely Alan Wallace, described as a minor landholder in Renfrewshire (southwestern Scotland). The family held some land but was not among Scotland’s powerful nobility.
The name “Wallace” (also spelled “Walays” or “le Waleys”) derives from terms meaning “foreigner” or “Welshman”, possibly indicating Welsh or Strathclyde Briton ancestry somewhere in the family background.
He likely received some education and military training, as his later tactical sophistication suggests more than mere natural ability. Minor nobility typically received basic education in reading (at least Latin for religious purposes), military skills, and estate management.
He may have been an outlaw even before 1297, possibly for killing an English official or soldier in a personal dispute. Later sources claim various such incidents, but verifying them is impossible.
What we don’t reliably know:
Specific details of his early life, family relationships, or education—later sources provide stories, but these may be legendary rather than historical.
His exact status in 1296-1297—whether he owned land, held any official position, or was already outside the law.
His physical appearance—descriptions of Wallace as exceptionally tall and strong may be accurate or may be legendary enhancements.
This documentary silence is actually significant. It suggests Wallace truly did emerge from relative obscurity rather than being part of the established nobility. His rise represented something unusual—a man from the middle ranks of Scottish society, without great inherited power or wealth, who through ability and determination became a national military leader.
The Outbreak of Resistance (1297)
Scottish resistance to English occupation began to crystallize in early 1297, sparked by multiple factors:
Heavy taxation imposed by English administrators to fund Edward I’s wars in France created widespread resentment.
English officials’ arrogance and abuses of power angered Scots across the social spectrum.
The humiliating treatment of Scotland as a conquered province rather than a temporarily occupied kingdom sparked nationalist sentiment.
Economic disruption from occupation affected merchants, craftsmen, and farmers.
In May 1297, resistance broke out in multiple locations across Scotland:
In the north, Andrew de Moray (sometimes spelled Murray), a nobleman whose father was imprisoned by the English, began organizing resistance in the Highlands.
In the southwest, William Wallace emerged as a leader of guerrilla attacks against English forces and officials.
Other minor nobles and commoners also began resisting, though these movements were initially uncoordinated.
Wallace’s early actions (as far as can be determined from later sources) included:
Attacks on English officials and soldiers in southwestern Scotland
Raids on English supply convoys and isolated garrisons
Gathering followers from among those displaced by English rule—younger sons without land, former soldiers, outlaws, and common people willing to fight
Avoiding pitched battles where English forces would have overwhelming advantages
These guerrilla actions, while militarily minor, had psychological importance—they demonstrated that English control was not absolute and that resistance was possible.
The Junction of Forces: Wallace and Moray Unite
By summer 1297, two significant resistance movements had emerged:
Andrew de Moray in the north had successfully captured several castles and controlled much of the Highlands.
William Wallace in the south had gathered a substantial following and was conducting increasingly bold operations.
The two leaders joined forces, likely recognizing that united action offered the best chance for significant success. This collaboration would prove crucial at Stirling Bridge.
The combined force represented something unusual in medieval Scottish warfare:
It included both nobility (Moray) and lesser ranks (Wallace), creating a broader social base than typical noble-led armies.
It relied heavily on infantry rather than cavalry, as neither leader could field the mounted knights that dominated medieval warfare.
It employed guerrilla and mobile tactics rather than traditional set-piece battles.
It was motivated by nationalist sentiment rather than feudal obligations or personal ambitions alone.
By September 1297, this combined force positioned itself near Stirling, where they would achieve their greatest victory.
The Battle of Stirling Bridge (1297): Tactical Triumph
Strategic Importance of Stirling
Stirling occupied perhaps the most strategically important position in Scotland. The castle, perched on a volcanic crag, commanded the lowest crossing point of the River Forth—effectively the gateway between the Scottish Highlands and Lowlands.
Whoever controlled Stirling controlled movement through central Scotland:
Armies advancing north from England had to pass through Stirling to reach the Highlands effectively.
Trade and communications between northern and southern Scotland flowed through Stirling.
The castle itself was nearly impregnable, its position making it extremely difficult to capture.
In September 1297, an English army under John de Warenne, Earl of Surrey, marched north to crush the Scottish rebellion. Warenne was an experienced commander, though elderly, and he led a force of perhaps 10,000-15,000 men including heavy cavalry—the elite shock troops of medieval warfare.
Wallace and Moray positioned their forces north of the River Forth, near the old wooden bridge at Stirling. Their army was smaller—perhaps 6,000-8,000 men, mostly infantry with few cavalry. By any conventional military assessment, they should have been destroyed by Warenne’s superior force.
The Battle: September 11, 1297
The Battle of Stirling Bridge stands as one of the most brilliant tactical victories in medieval military history—a masterclass in using terrain, timing, and enemy psychology to overcome overwhelming material disadvantages.
The Setup: Choosing the Killing Ground
Wallace and Moray positioned their forces carefully:
They occupied elevated ground north of the River Forth, giving them observation of the bridge and surrounding area.
They did not contest the bridge itself initially, allowing the English to believe they could cross unopened.
The Scottish forces were positioned where they could quickly move to engage English forces after they crossed but were not immediately visible in full strength.
The bridge itself was the key to the battlefield:
It was narrow—only two or three horsemen could cross abreast, meaning the English army could only cross slowly in small groups.
The northern approach to the bridge had soft, marshy ground, making it difficult terrain for heavy cavalry.
Once across, English forces would be trapped between the river behind them and whatever forces awaited them ahead.
The causeway leading to the bridge meant that troops crossing were vulnerable from multiple directions.
The English Approach: Overconfidence and Delay
Earl of Surrey, confident in his superior numbers and cavalry, approached the situation with dangerous overconfidence:
He was reportedly still in bed when the battle began, having delegated command to subordinates (according to some accounts).
English knights reportedly objected to having to dismount to cross the narrow bridge, considering it beneath their dignity.
Some English commanders recognized the danger of crossing such a narrow bridge in the face of an enemy army, but Surrey dismissed their concerns.
Crucially, Surrey ignored or rejected offers from local guides to show him a ford downstream where his cavalry could cross in force—either because he didn’t trust Scottish guides or because he was too overconfident to believe he needed such tactics.
The English began crossing the bridge early in the morning, with cavalry leading the way as was standard practice.
The Trap Springs: Destruction of the English Vanguard
Wallace and Moray waited with remarkable discipline as English forces crossed. They allowed perhaps 5,000 English soldiers—including significant numbers of cavalry—to cross before springing their trap.
At a crucial moment, the Scots attacked:
A force of Scottish infantry rushed to seize the southern end of the bridge, cutting off the English vanguard from reinforcement or retreat.
The main Scottish force charged down from the high ground, catching the English forces in the marshy ground where cavalry couldn’t maneuver effectively.
Scottish spearmen, organized in the schiltron formation (tight circles of men with long spears pointing outward), proved devastatingly effective against cavalry that couldn’t charge properly in the soft ground.
The English forces on the north bank were trapped—they couldn’t retreat across the blocked bridge, couldn’t receive reinforcements, and couldn’t deploy their cavalry effectively in the marshy terrain.
The result was slaughter:
Hundreds or thousands of English soldiers were killed (sources vary widely on exact numbers, but all agree casualties were heavy).
Many English knights drowned in the River Forth, weighed down by armor as they tried to swim to safety.
Hugh de Cressingham, Edward I’s treasurer in Scotland and one of the most hated English officials, was killed. According to tradition (possibly legendary), Wallace had his skin flayed from his body and made into a belt—a grisly trophy symbolizing Scottish revenge.
The remaining English forces south of the river, witnessing the disaster, retreated without engaging. Earl of Surrey fled south with the remnants of his army.
The Battle of Stirling Bridge was a complete tactical victory—an outnumbered force using terrain, timing, and superior tactics had destroyed a much larger, better-equipped enemy.
The Significance of Stirling Bridge
The victory at Stirling Bridge was militarily and psychologically transformative:
It proved English forces could be beaten decisively, shattering the psychological advantage they’d held since Dunbar.
It demonstrated that innovative tactics could overcome traditional military advantages like heavy cavalry.
It established Wallace (and Moray, though he was wounded in the battle and died later) as brilliant military leaders capable of defeating experienced English commanders.
It opened southern Scotland to Scottish control, as English garrisons evacuated or surrendered in the wake of Surrey’s defeat.
It inspired broader Scottish resistance, with nobles who had submitted to Edward now reconsidering their positions.
It infuriated Edward I, who had believed Scotland permanently subdued and now faced a revived resistance movement.
For William Wallace personally, Stirling Bridge transformed him from guerrilla leader to national hero. Within weeks, he would be appointed Guardian of Scotland.
Wallace as Guardian of Scotland (1297-1298)
Appointment and Authority
Following Stirling Bridge, William Wallace was appointed Guardian of Scotland—effectively the nation’s military and political leader in the absence of a king.
This appointment was remarkable for several reasons:
Wallace was not from the high nobility, yet he was placed in command of Scotland’s armies and government. This would have been almost unthinkable in normal circumstances.
His authority was based purely on military success and popular support, not hereditary right or feudal obligation.
He technically ruled in the name of King John Balliol (still alive but imprisoned in England), maintaining the legal fiction of Scottish monarchical legitimacy.
Not all Scottish nobles accepted his authority, with some considering him an upstart who had risen above his station.
As Guardian, Wallace wielded considerable power:
Military command over Scottish forces
Diplomatic authority to negotiate with foreign powers
Administrative control over liberated Scottish territories
Judicial powers in some contexts
However, his position was inherently unstable—dependent on continued military success and unable to command the automatic loyalty that a king or great noble might expect.
The Raid into Northern England (1297-1298)
In late 1297 and early 1298, Wallace led Scottish forces in raids into northern England, a military strategy that served multiple purposes:
Economic warfare: Raiding disrupted the English economy in border regions, making the war costly for England.
Gathering supplies: Scottish forces could seize provisions, weapons, and wealth from English territories.
Psychological impact: Bringing war to English soil reversed the dynamic where Scotland was always the battlefield.
Keeping the initiative: Offensive action prevented English forces from reorganizing and invading Scotland.
Demonstrating strength: Successful raids showed that Scotland could project military power, not just defend.
These raids penetrated as far as Newcastle and Durham, creating panic among English civilians and embarrassing English authorities who couldn’t protect their own people.
Contemporary English chroniclers described these raids in horrific terms, though their accounts were likely exaggerated to emphasize Scottish brutality and justify English military response.
For Wallace, these operations demonstrated that he was not merely defending Scotland but could threaten England itself—a powerful position for negotiations.
The Diplomatic Front: Seeking European Support
Wallace also engaged in diplomacy, attempting to secure international recognition and support for Scottish independence:
He wrote to the merchants of Lübeck and Hamburg (important Hanseatic League cities), informing them that Scotland was again open for trade and that Scottish merchants could operate safely.
He may have sought support from France through the Auld Alliance, though evidence of specific negotiations is limited.
He attempted to position Scotland as an independent kingdom in European diplomacy, not an English province.
These diplomatic efforts had limited immediate success—European powers were reluctant to significantly support Scotland against powerful England—but they established precedents for later diplomatic initiatives.
The Battle of Falkirk (1298): Crushing Defeat
Edward I Returns: The King Takes Command
News of Stirling Bridge and Wallace’s raids enraged Edward I, who had been campaigning in France. He immediately began organizing a massive military response, determined to personally crush the Scottish rebellion.
Edward assembled one of the largest English armies of his reign:
Estimates suggest 15,000-25,000 men, though exact numbers are debated.
Heavy cavalry numbering in the thousands, including the finest English and Welsh knights.
Perhaps 10,000-15,000 longbowmen, many of them Welsh. The English longbow would prove decisive at Falkirk.
Substantial supplies and logistics to support an extended campaign.
Edward himself commanded, bringing his formidable military reputation and determination.
In July 1298, this massive force invaded Scotland, marching north with the specific goal of finding and destroying Wallace’s army.
The Decision to Fight
Wallace faced a critical strategic decision: Should he avoid battle, retreat to the Highlands, and return to guerrilla warfare? Or should he stand and fight, risking everything in a pitched battle?
Factors favoring avoiding battle:
Edward’s army was larger and better equipped, making victory unlikely in conventional combat.
Guerrilla warfare had worked well for Wallace so far.
The Highlands offered refuge where English heavy cavalry would be less effective.
Dragging out the war might eventually exhaust English resources and will.
Factors that led Wallace to fight:
He needed supplies that were increasingly difficult to obtain through raiding alone.
Avoiding battle might be seen as weakness, undermining his authority.
His army’s morale depended on confidence in their commander’s willingness to fight.
He may have believed his tactics could succeed against even Edward’s larger force.
The political situation required a decisive action to maintain momentum.
Wallace chose to fight, positioning his army near Falkirk on July 22, 1298. Whether this was a deliberate decision to seek battle or whether Edward’s army found Wallace before he could avoid combat is debated.
The Battle: July 22, 1298
The Battle of Falkirk would be drastically different from Stirling Bridge—no narrow bridge to channel the enemy, no marshy ground to neutralize cavalry, just open battlefield where English advantages in numbers and equipment would tell.
The Scottish Position
Wallace deployed his army in a defensive formation:
Four large schiltrons (circular formations of spearmen), each containing perhaps 1,000-2,000 men, formed the core of his defensive line.
The spearmen carried long spears (12-15 feet), presenting a bristling hedge of points that horses wouldn’t charge into.
The schiltrons were positioned on slightly elevated ground, giving the Scots some advantage in observation and position.
Archers were positioned between the schiltrons, providing some ranged firepower.
Whatever cavalry Wallace had (probably only a few hundred horsemen) were positioned on the flanks.
Stakes were driven into the ground in front of the schiltrons, creating obstacles to cavalry charges.
Ropes connected the stakes, making it even more difficult for horses to penetrate the defensive position.
This defensive formation had worked against cavalry charges at other battles and represented Wallace’s best chance of victory given his forces’ composition.
The English Attack and Scottish Collapse
Edward I’s approach was methodical and professional:
He personally observed the Scottish position, assessing its strengths and weaknesses.
He organized a three-phase attack that would exploit English advantages while minimizing risks.
The battle unfolded disastrously for the Scots:
Phase One – Cavalry Assault:
- English heavy cavalry charged the Scottish position
- The schiltrons held firm against the cavalry charges
- Knights could not penetrate the wall of spears
- However, the Scottish cavalry and archers, less disciplined and less protected, broke and fled early in the battle
- This abandonment (whether from cowardice, panic, or calculation that the battle was lost) left the infantry unsupported
Phase Two – The Longbow Massacre:
- With Scottish cavalry gone and the schiltrons stationary, Edward deployed his secret weapon—massed longbowmen
- Thousands of longbowmen began shooting into the packed Scottish formations from a distance
- The longbow was devastatingly effective against massed infantry—with a range of 200+ yards and the ability to penetrate armor at closer ranges
- The schiltrons, designed to stop cavalry, had no defense against arrows
- Men packed tightly together presented easy targets
- As casualties mounted, the schiltrons began to lose cohesion
Phase Three – Final Cavalry Assault:
- Once the Scottish formations were weakened and disorganized by archery, English cavalry charged again
- This time, they broke through the disrupted schiltrons
- The battle became a rout, with Scottish infantry massacred as they tried to flee
The casualties were horrific:
- Perhaps 2,000-10,000 Scots killed (sources vary widely)
- Many were cut down in the rout as they fled
- English casualties were relatively light
Wallace himself escaped the battlefield, but his army had been destroyed, his reputation as an invincible commander shattered, and his position as Guardian made untenable.
The Aftermath: Resignation and Return to Guerrilla War
In the wake of Falkirk, Wallace’s political position became impossible:
He resigned as Guardian of Scotland (or was forced to resign), replaced by Robert the Bruce and John Comyn (bitter rivals whose joint guardianship proved ineffective).
Many Scottish nobles who had supported him after Stirling Bridge now distanced themselves or submitted to Edward.
The common people who had formed the core of his army were demoralized by the catastrophic defeat.
Wallace himself became a hunted fugitive, though he continued resistance activities for another seven years.
The Battle of Falkirk demonstrated a harsh reality: inspiring leadership and tactical innovation could win battles like Stirling Bridge, but without the resources to match England’s professional armies and advanced weaponry (the longbow), Scottish independence would require more than Wallace alone could provide.
The Years in Shadow (1298-1305): Continuing Resistance
Wallace as Outlaw and Guerrilla Leader
After resigning as Guardian, Wallace effectively disappeared from the historical record for years, with only fragmentary evidence of his activities. This documentary silence makes it impossible to reconstruct his movements or actions in detail.
What we can reasonably infer:
He continued some form of resistance activity, as Edward I maintained prices on his head and efforts to capture him.
He likely operated in forests and remote areas, using guerrilla tactics and avoiding pitched battles.
He may have traveled to France, seeking military or diplomatic support (some sources suggest this, but evidence is limited).
His role shifted from national military leader to outlaw and guerrilla fighter—important symbolically but less militarily significant than during his time as Guardian.
During this period, Scottish resistance continued but became fragmented:
Robert the Bruce and John Comyn (joint Guardians) couldn’t work together effectively and accomplished little.
Various Scottish nobles submitted to Edward, received pardons, and resumed control of their lands.
Some resistance continued in the Highlands and remote areas, but organized opposition largely collapsed.
By the early 1300s, Edward I appeared to have largely pacified Scotland, though resentment simmered beneath the surface.
The Betrayal and Capture (1305)
By 1305, William Wallace had been a fugitive for seven years, hunted by both English forces and Scottish collaborators. The circumstances of his capture remain somewhat unclear, but the basic facts are established.
On August 5, 1305, Wallace was captured near Glasgow by men led by Sir John de Menteith, a Scottish knight in English service.
The circumstances suggest betrayal:
Menteith may have been Wallace’s host, with the capture occurring when Wallace believed himself among friends.
Menteith had previously fought for Scottish independence but had submitted to Edward and was now working for the English.
The capture was too neat to be accidental—Menteith clearly knew where Wallace would be and when.
Menteith received substantial rewards from Edward I for the capture, confirming English involvement in the plan.
Wallace was immediately transported to London under heavy guard, with Edward determined to make an example of him.
The Trial and Execution: Creating a Martyr
The Trial: August 23, 1305
Wallace was brought to Westminster Hall in London, where he faced charges before English justices. This was not a trial in any modern sense—the verdict was predetermined, and Wallace had no realistic opportunity to defend himself.
The charges against Wallace included:
Treason against King Edward I of England Murder of English officials and soldiers Robbery and arson during raids into England Various acts of warfare against English forces
Wallace’s response to the charges (according to later accounts, possibly legendary) was that he could not be a traitor to Edward I because he had never sworn allegiance to the English king—he had always fought for Scotland’s legitimate king, John Balliol.
This defense was legally sophisticated and historically accurate, but it didn’t matter. The trial was political theater, not a genuine legal proceeding. Wallace was convicted on all charges, and the sentence was death by the most brutal means available.
The Execution: August 23, 1305
On the same day as his conviction, Wallace was executed—a demonstration of Edward I’s determination to swiftly and publicly destroy Scotland’s most famous rebel.
The execution method was “hanging, drawing, and quartering”, a punishment reserved for traitors and designed to be as painful, humiliating, and terrifying as possible:
Wallace was dragged through London’s streets tied to a horse’s tail, suffering humiliation and injury before reaching the execution site at Smithfield.
He was hanged by the neck until nearly dead but cut down while still alive—the “hanging” phase was designed to cause suffering without immediately killing.
He was then emasculated and disemboweled while still conscious—the “drawing” phase, where internal organs were removed. According to some accounts, his intestines were burned before his eyes.
His heart was removed and likely also burned.
Finally, he was beheaded—a merciful end after the preceding torture.
His body was then quartered—cut into four pieces that were sent to different Scottish towns (Newcastle, Berwick, Stirling, and Perth) to be displayed as warnings. His head was placed on a spike on London Bridge.
This execution was designed to serve multiple purposes:
Terror: The gruesome display was meant to intimidate other potential rebels.
Humiliation: The public nature and degrading elements were designed to destroy Wallace’s legend.
Finality: The distribution of body parts ensured no shrine could be created at a single location.
Propaganda: Edward could claim Scotland’s most dangerous rebel had been utterly destroyed.
However, the execution failed utterly in its intended effect. Rather than crushing Scottish resistance, Wallace’s martyrdom inspired it.
The Legend Begins: Wallace as Martyr
Wallace’s execution transformed him from defeated rebel to eternal symbol of Scottish resistance:
His refusal to acknowledge Edward’s authority—maintaining that he was not a traitor because he had never sworn allegiance to England—resonated powerfully with Scots who rejected English rule.
His courage in facing torture and death (accounts suggest he bore his suffering without crying out or begging for mercy, though such accounts may be legendary) enhanced his heroic status.
The brutality of his execution shocked even medieval sensibilities accustomed to violence, making Edward appear cruel and vindictive.
His last words (according to later tradition) were “Freedom!”—though this may be legendary, it captures how Wallace came to symbolize Scotland’s fight for independence.
Within months of Wallace’s execution, Robert the Bruce would murder John Comyn, claim the Scottish throne, and reignite the Wars of Scottish Independence—inspired in part by Wallace’s example.
The Legacy of William Wallace
Immediate Impact: Inspiring Bruce and Scottish Independence
The most direct historical impact of William Wallace was his inspiration to Robert the Bruce and the eventual achievement of Scottish independence.
Robert the Bruce, who had been on both sides of the conflict, apparently learned crucial lessons from Wallace’s career:
Military tactics: Bruce would use similar schiltron formations and guerrilla warfare strategies that Wallace had pioneered.
Nationalist appeal: Bruce recognized that Scottish independence was a cause that could unite people across social classes.
Perseverance: Wallace’s refusal to surrender despite defeat and exile demonstrated the power of determination.
The importance of martyrdom: Wallace’s death had galvanized Scottish resistance more effectively than his military victories.
When Bruce claimed Scotland’s throne in 1306 and led Scotland to ultimate victory at Bannockburn (1314), he was building on foundations Wallace had laid—both military and psychological.
The Treaty of Edinburgh-Northampton (1328), which recognized Scottish independence, represented the fulfillment of what Wallace had fought for, even though he didn’t live to see it.
Cultural Legacy: From Man to Legend
William Wallace’s transformation from historical person to legendary hero began almost immediately after his death and has continued for over seven centuries.
Blind Harry’s “Wallace” (c. 1477):
- Written nearly 200 years after Wallace’s death
- An epic poem of over 11,000 lines detailing Wallace’s life
- Mixes historical facts with legendary embellishments
- Became the primary source for most later Wallace traditions
- Read widely in Scotland for centuries, shaping popular understanding of Wallace
Wallace in Scottish National Identity:
- The Wallace Monument in Stirling (completed 1869) stands 220 feet tall, dominating the landscape near the site of his greatest victory
- Countless streets, buildings, schools, and institutions across Scotland bear his name
- His story became central to Scottish national identity, particularly during periods of Scottish-English tension
- Scottish emigrant communities worldwide have invoked Wallace as a symbol of their heritage
Political Uses of Wallace:
- Scottish nationalists have repeatedly invoked Wallace to support arguments for Scottish independence
- During the 1995 Scottish devolution referendum and 2014 independence referendum, Wallace’s memory was invoked by both sides
- His image appears on Scottish currency, monuments, and tourist materials
“Braveheart” and Modern Popular Culture
The 1995 film “Braveheart,” directed by and starring Mel Gibson, brought Wallace’s story to a global audience—but at the cost of historical accuracy.
The film’s impact on Wallace’s legacy is complex:
Positive aspects:
- Introduced Wallace’s story to millions worldwide who had never heard of him
- Reinvigorated interest in Scottish history and the Wars of Scottish Independence
- Created emotional connection to themes of freedom and resistance
- Tourism to Wallace-related sites in Scotland increased dramatically
Historical inaccuracies:
- The film contains numerous significant errors in chronology, events, personalities, and cultural details
- The romance with Princess Isabella is entirely fictional (she was a child during the events depicted)
- The portrayal of Bruce as betraying Wallace contradicts historical evidence
- Battle tactics and military equipment are often anachronistic or wrong
- The famous “Freedom!” dying words, while emotionally powerful, may be legendary rather than historical
For historians, “Braveheart” presents a dilemma:
- It popularized an important historical figure but taught historical falsehoods to millions
- It created emotional resonance with Wallace but made it harder to discuss the actual historical person
- It demonstrated the power of film to shape historical memory, for better or worse
Comparative Assessment: Wallace in Historical Context
William Wallace can be productively compared to other resistance leaders and national heroes:
Like Joan of Arc, Wallace rose from relative obscurity to lead national resistance, achieved remarkable military success despite overwhelming odds, was eventually captured and executed, and became a martyr whose memory inspired continued struggle.
Like Spartacus, Wallace led resistance against a powerful empire, achieved initial victories through tactical innovation, was eventually defeated and executed, and became a legendary symbol of resistance to oppression.
Like Boadicea (Boudicca), Wallace fought against imperial expansion into his homeland, achieved notable early victories, was ultimately overwhelmed by superior resources, and became a national symbol long after death.
Unlike many resistance leaders, Wallace never held ultimate political power (as Guardian, he ruled in a king’s name) and died without seeing his cause succeed—yet his legacy proved more enduring than many who achieved immediate victory.
Why Wallace Matters: Universal Themes
William Wallace’s story resonates across cultures because it addresses universal human experiences:
Resistance to injustice: His fight against English occupation speaks to anyone who has faced oppression or foreign domination.
David vs. Goliath: His victories against superior forces demonstrate that tactical intelligence and determination can overcome material disadvantages.
Martyrdom and sacrifice: His willingness to endure torture and death rather than surrender his principles exemplifies commitment to ideals above personal survival.
National identity: His role in Scottish identity formation illustrates how individuals can come to symbolize collective aspirations.
The power of legacy: Though he died in defeat, his memory inspired others to achieve what he could not—demonstrating that influence can extend beyond one’s lifetime.
Conclusion: Who Was William Wallace?
William Wallace lived only about 35 years, and his period of military and political prominence lasted barely more than a year—from his victory at Stirling Bridge in September 1297 to his defeat at Falkirk in July 1298. Yet in that brief window, he achieved military victories that shocked medieval Europe, rose from obscurity to national leadership, and created a legacy that has endured for over seven centuries.
The historical William Wallace—stripped of later legendary embellishments—remains impressive: a minor nobleman who demonstrated remarkable tactical intelligence at Stirling Bridge, who inspired common people to resist occupation, who led Scotland during its darkest hour, and who refused to surrender his principles even when facing torture and death.
His tactical innovations, particularly at Stirling Bridge, demonstrated that medieval infantry could defeat cavalry through intelligent use of terrain and timing—lessons that influenced warfare beyond Scotland.
His role in Scottish resistance kept alive the possibility of independence during a period when Scotland seemed permanently conquered, providing inspiration for Robert the Bruce’s ultimately successful campaign.
His martyrdom transformed him from military leader to eternal symbol, demonstrating the paradoxical power of noble defeat—his execution galvanized Scottish resistance more effectively than continued guerrilla warfare might have.
The legendary William Wallace—the superhuman hero of Blind Harry’s epic poem and popular imagination—may distort historical reality, but the legend serves important cultural functions. Symbols and stories shape how people understand themselves and their possibilities, and Wallace’s legend has inspired not just Scots but people worldwide facing their own struggles for freedom and justice.
The challenge for historians and educators is to honor both the historical person and the legendary symbol—to appreciate Wallace’s genuine achievements and character while acknowledging the myths that have accumulated around him, and to understand how and why his memory has been shaped and reshaped across centuries.
Seven hundred years after his execution, William Wallace remains Scotland’s most recognized hero—his name synonymous with resistance, courage, and the fight for freedom. Whether the historical man would recognize the legend that grew from his sacrifice is unknowable, but the enduring power of his story testifies to fundamental human desires for justice, freedom, and the belief that individuals can change history.
In an age of nation-states and national identities, of ongoing debates about self-determination and independence, of persistent questions about when and how to resist injustice, William Wallace’s story remains relevant—not because Hollywood made a movie about him, but because the themes his life embodied—resistance, sacrifice, determination, and the power of symbols—continue to resonate with human experience across time and culture.
The man died in agony on a scaffold in London in 1305. The legend lives on, inspiring each generation to ask itself: What principles are worth fighting for? What sacrifices are worth making? And can one person really make a difference? William Wallace’s life suggests that the answers matter more than we might imagine.
Additional Resources
For those interested in learning more about William Wallace and medieval Scotland:
- Historic Environment Scotland provides information about the Battle of Stirling Bridge site and the Wallace Monument
- The National Wallace Monument offers historical exhibits and resources about Wallace’s life and legacy